Showing posts with label free pattern. Show all posts

Hearts and Stripes Forever

I get quite a few requests on how to make this hat so I thought I would take a minute and share with you my recipe.  


Hearts and Stripes Forever It is really just a basic beanie...I usually use ww yarn and a 5.0mm hook. 
by Christina Ramirez
yarnovercrochet@hotmail.com

I changed yarn colors every other row and just carried it.

Basic Beanie Recipe
Start with 10dc in a loop and pull tight. * If you would like a more fitted beanie I would only work 9dc.

Baby 0-3 months
Finished measurement 14”
In an adjustable ring, ch 2, 10dc and pull to tighten ring
Round 1 Ch 2, 2 dc in each st around (20dc)
Round 2 Ch 2, *dc in next dc, dcinc in next dc* repeat in each st around (30 dc)
Round 3 Ch 2, *dc in next 2 dc, dcinc in next dc* repeat in each st around (40 dc)
*See Below

Baby 3-6 months
Finished measurement 15.5”
In an adjustable ring, ch 2, 10dc and pull to tighten ring
Round 1 Ch 2, 2 dc in each st around (20dc)
Round 2 Ch 2, *dc in next dc, dcinc in next dc* repeat in each st around (30 dc)
Round 3 Ch 2, *dc in next 2 dc, dcinc in next dc* repeat in each st around (40 dc)
Round 4 Ch 2, *dc in next 9 dc, dcinc in next dc* repeat twice more, dc in next 8 dc, dcinc in next 2 dc (45 dc)
*See Below

Baby 6-12 months
Finished measurement 17”
In an adjustable ring, ch 2, 10dc and pull to tighten ring
Round 1 Ch 2, 2 dc in each st around (20dc)
Round 2 Ch 2, *dc in next dc, dcinc in next dc* repeat in each st around (30 dc)
Round 3 Ch 2, *dc in next 2 dc, dcinc in next dc* repeat in each st around (40 dc)
Round 4 Ch 2, *dc in next 3 dc, dcinc in next dc* repeat in each st around (50 dc)
*See Below

Toddler
Finished measurement 19”
In an adjustable ring, ch 2, 10dc and pull to tighten ring
Round 1 Ch 2, 2 dc in each st around (20dc)
Round 2 Ch 2, *dc in next dc, dcinc in next dc* repeat in each st around (30 dc)
Round 3 Ch 2, *dc in next 2 dc, dcinc in next dc* repeat in each st around (40 dc)
Round 4 Ch 2, *dc in next 3 dc, dcinc in next dc* repeat in each st around (50 dc)
Round 5 Ch 2, *dc in next 9 dc, dcinc in next dc* repeat four more times (55 dc)
*See Below

Child
Finished measurement 21”
In an adjustable ring, ch 2, 10dc and pull to tighten ring
Round 1 Ch 2, 2 dc in each st around (20dc)
Round 2 Ch 2, *dc in next dc, dcinc in next dc* repeat in each st around (30 dc)
Round 3 Ch 2, *dc in next 2 dc, dcinc in next dc* repeat in each st around (40 dc)
Round 4 Ch 2, *dc in next 3 dc, dcinc in next dc* repeat in each st around (50 dc)
Round 5 Ch 2, *dc in next 4 dc, dcinc in next dc* repeat in each st around (60 dc)

*Continue alternating color rows until desired length keep in mind that you are going to add a brim and that will probably measure 1.5 to 2 inches

For Brim
Alternate 3 front post double crochet (fpdc) and 2 back post double crochet (bpdc). For maybe 3 or 4 rows depending on size and desired look. * If you only did 9dc at the beginning, then maybe work a 3fpdc, 3bpdc.

Heart pattern: 
lovestitchlove.blogspot.com/2013/01/the-perfect-heart-applique.html

Please feel free to sell any items you make from my patterns but please do not reproduce my pattern as your own.  You do not have to credit me when listing items for sale but if you love it please feel free to tell everyone where they can get one!

The Perfect Heart Applique

The Perfect Heart Applique
by Christina Ramirez

Measures about 3 inches across
Materials: Worsted weight yarn and size H (5.0 mm) hook

In an adjustable ring, ch 2 and dc 11 times.  Pull loop closed.
Row 1    Turn and sc in first st. 2 dc in the next 2 sts.  Dc in the next 2 sts.  Dc, tc, dc in the next st.  dc in the next 2 sts. 2 Dc in the next 2 sts. and sc in the last.
Row 2    Do not turn.  Sl st in ch 2 space to the adjustable loop, sl st in the loop and sl st back up to the beginning of the row in the dc from the first row (total of 3 sl sts)
Sc in first sc from Row 1. 2 sc in the next st. Sc in the next st. 2 sc in the next st. Sc in the next 4 sts. Sc, hdc, sc in the next st. Sc in the next 4 sts. 2 sc in the next st. Sc in the next st. 2 sc in the next st. Sc in the last st. Sl st the next 3 sts to take you back to the adjustable loop.  Tie off and pull tail through loop.


Please feel free to sell any items you make from my patterns but please do not reproduce my pattern as your own.  You do not have to credit me when listing items for sale but if you love it please feel free to tell everyone where they can get one!

Toddler Hat and Scarflet


So I had a friend ask me if I could make a mini scarf for her toddler.  Apparently in true toddler girl form, she likes to dress up and put stuff around her neck so why not something functional and safer than maybe most things she might find, right?  So this is what I came up with.


Don't you think it needs a matching hat?  Well, I did and so I made one of those too! This stitch pattern has such great texture and the ruffles just girl it up big time!  I hope she likes it.  Hopefully I will get some pictures this weekend.


So I put together a pattern for the hat and scarf which you can find on Ravelry and Etsy. 


Heart Button

This is not actually serving as a button!  I have attached a button on the underside of the scarf.
It is stiff enough to use as a button but I needed this to be adjustable so a smaller button was needed.   It would be good on an over-sized cowl or something.

In an adjustable loop, sc, 3dc, 2hdc, dc, 2hdc, 3dc.  Pull loop closed but do not tighten all the way.  Sc around through the middle 12 times. Don't pull too tight so that it doesn’t change the overall shape.  Sl st tightly through the middle in the valley of the heart.  Sl st in next 6 st, ch 1, sl st in last 6.  Cut yarn leaving a tail for sewing.  Pull tail through middle.

For a bigger heart button, sc 8 times in loop first and work the 3 dc in one st and continue around as before and put the last 3 dc in the last st.


The Music Monster - iPod/ iPhone Case

The Music Monster
by Christina Ramirez


I did this project with my step-daughter in mind.  She is barely a teenager but has some pretty snazzy electronics.  Let's face it...teens + electronics = catastrophe.  Not that I think that this will keep it from getting broken, but maybe eliminate some damage from general wear and tear.  Besides...he is cute. :)  This works up super fast and makes a great last minute gift!

Materials:
Cotton worsted weight yarn (I used Lily's Sugar 'n Cream)
5mm hook
yarn needle
buttons and felt (if desired)

Pattern:
Finished size: approx 3x5

Row 1:  Chain 10.  Sc in 2nd ch from hook.  Sc in next 7st. 3 sc in next st.  Continue to work on opposite side of chain. Sc in next 8st. 3sc in last st.  Do not join.
Row 2-18: Sc around (22 st)
Row 19: Ch 1, turn.  Sc in next 11 st.
Row 20: Ch 1, Sctog in first two sc.  7 sc. Sctog in last two sc.
Row 21-28: Sc across (9 sc)
Row 29: Ch 1, turn.  Sc back loops only. (9 sc)
Row 30-34: Ch 1, turn. Sc in next 9 sc. Tie off.


Ear Bud Pocket:

Row 29 (the back loop only row) is going to be the fold.  Fold over and pin if needed.  With opening side down, sc up the sides catching both layers.  You will start at the top on the left side and on the bottom of the flap on the right side.


The blue line is the last row stitched (Row 34)

The green line is the last of the continuous round stitches (Row 18)


The Teeth:
Turn case over with flap unfolded.  Attach yarn for teeth with a sl st on the loops created on Row 29 (back loop only row).  *(Sc, dc, ch 1, sc) in attaching st.  Sl st in next loop.* Repeat to the end and tie off.  This step can be done before sewing down the pocket.


Finishing:
The eyes:
Option 1: Buttons - I used two different sized buttons to give him crazy eyes. Since I had a crazy busy yarn, I added felt circles behind them when I sewed them down.
Option 2: Crochet – Small eye: With dark color, 5 sc in adjustable loop and pull to tighten.  Sl st into first st.  Change to white and 2 sc in each st around.  Sl st. to first st.  Sl st again going into last sc space to cover the gap in white.  Larger eye: Repeat small eye but instead of sc into the loop, make them hdc.

The tongue:  I sewed a red button on the case centered and just about in the middle.  Just fold down the flap and decide where it should be. 

Loop for closure:  Take yarn on a needle and start inside the pocket and loop needle out and back inside the pocket.  Tie the knot on the outside of the pocket first - this way you can decide how long the loop should be.  Then pull up excess yarn and tie tails into a knot.  


For the blue/purple one shown, I changed colors on the flap and I also whip stitched some 
fun fur along the top.  There are endless possibilities for your monster!


Fully lining a crochet/knitted hat


Have you ever wanted to add a lining to your hat to make it just a bit warmer?  I had someone ask me for a lined hat and so I was forced to get the wheels turning to put together something that would work and not be terribly difficult.  This process took me about 30 minutes to get together and get stitched in. 

First, make your hat.  I went up a size to allow for the additional fabric, but I probably didn't have to.  As long as the hat is not tight already and the fabric you are adding isn't super thick, you should be ok.

Next, you are going to fold your hat into quarters.  Grab a sheet of paper and trace the basic outline of the folded hat - disregarding earflaps and other additions.  If you plan on doing a few more hats in this size, mark it to use again.
My hat had earflaps, so I traced out just the earflap portion separately being sure to leave a little extra on the straight side.  I probably could have included the shape in my cut out, but this seemed easier.


Now cut your pieces.  You need four of the head pieces and two of the earflaps


Now it is time to sew!  Pick up two of your hat pieces and lay them like sides together.  Sew up one curved side only!  Do this again for the other two pieces.  Lay the two halves like sides together and sew up both curved sides.  You should have a basic hat shape at this point.  If you have earflaps, center the flap on a seam and sew to the main hat piece.


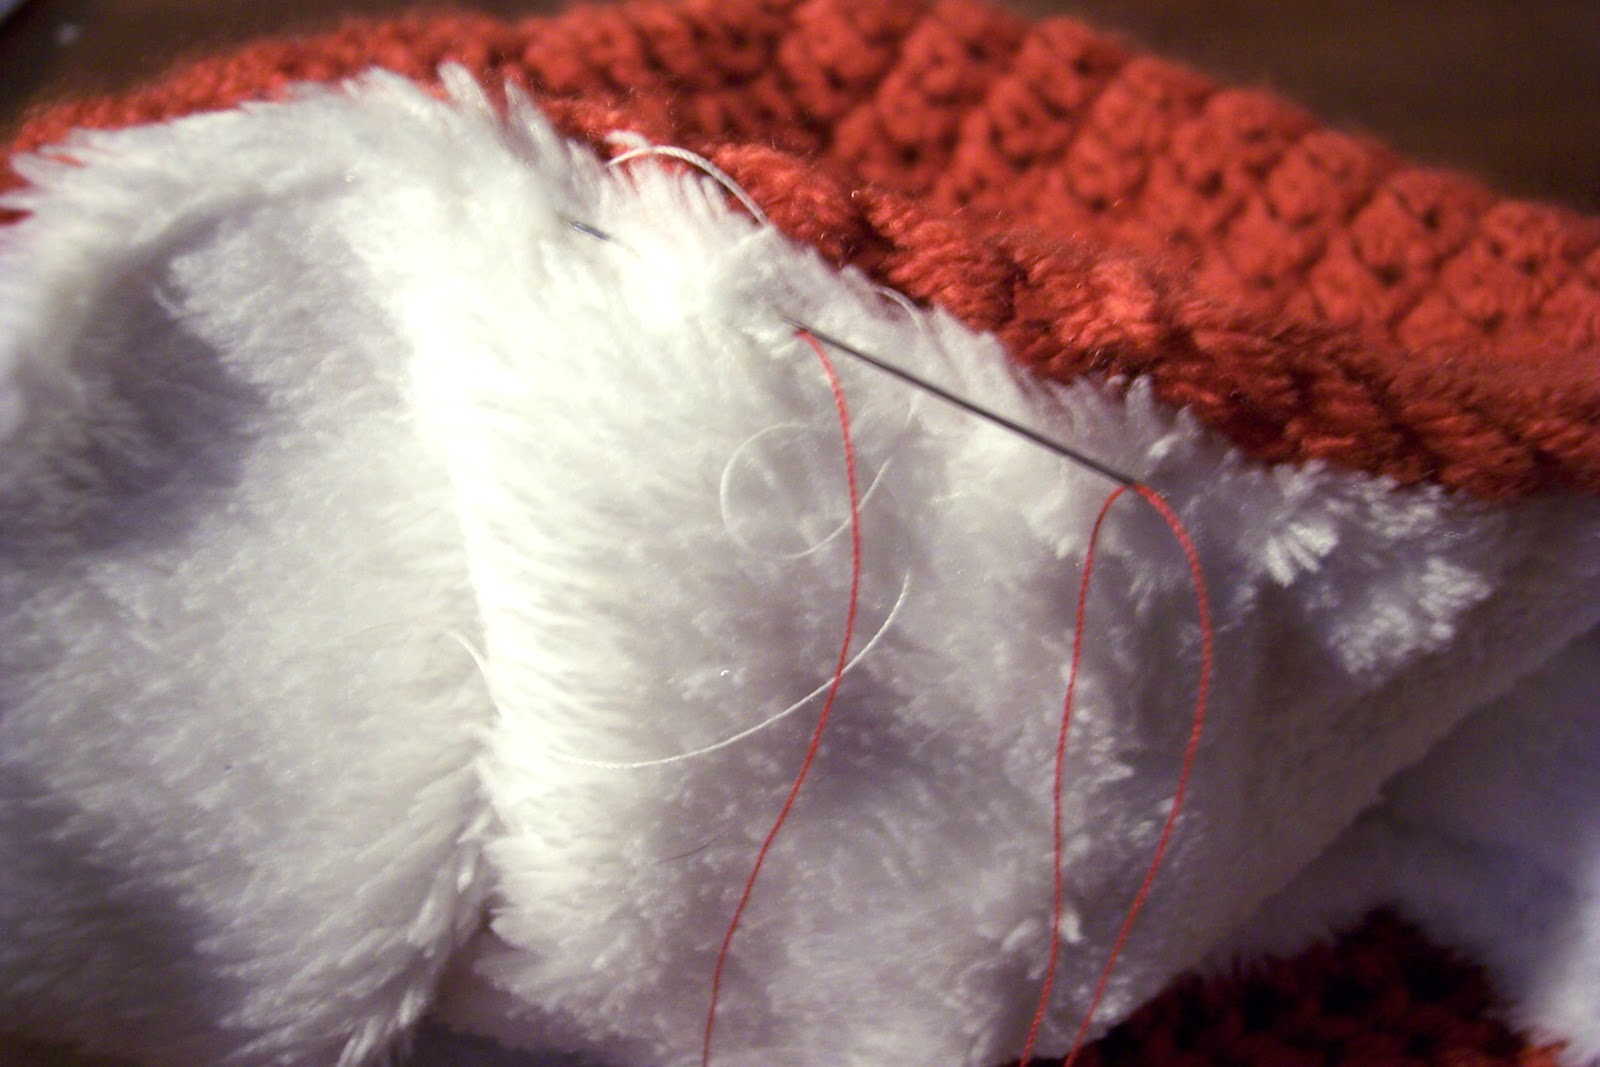
Now from this point you have options.  What I did, was roll a finished edge on my sewing machine.  BUT if you are a skilled stitcher, you may be able to sew into the hat while making a finished edge.  So after I finished the edge, I inserted the lining into the hat.  Make sure the pretty side is out!  I then grabbed a thread that would match my hat and sewed the lining in by hand.  My fabric was fuzzy enough that I made small stitches and it disappeared.


So once you get back to the beginning, you are FINISHED!


Quick color graduating tutorial


Would you believe that I used three solid colors to make that hat (minus the cute felt rocket ship)?

First find your favorite chunky weight, simple beanie pattern and three worsted weight yarns in colors that are in the same family but different shades (light, medium, dark).  I used Red Heart Super Saver.

Look at your pattern and if you are wanting a even graduation, divide your rows evenly by 5 (that is how many color changes you will have).  Of course if it doesn't quite work out by five...you can drop a color and go by four colors instead.

Next, decide whether you want light to dark or dark to light.  I wanted to create the look of the sky as a rocket leaves the atmosphere so I choose my darkest color first. 

Take two strands held together of the same yarn (either darkest or lightest) and work your first set of rows (determined previously).

To make it easy on yourself...cut one of your yarn strands and tie on the medium shade to the tail left behind and start to work your next set of rounds.  You should have two different colored strands in your hand.

Continue with the next color change which will be the complete removal of the first color.  Tie that tail to the medium shade so that both strands are the medium shade.  Complete your rounds.

Next you are going to do like you did before and remove one of the medium color strands and attach the remaining color yarn.  Complete your rounds and again you should have two different colors worked together.

Finally, tie off the medium color all together and attach the remaining color so that you have two strands of the same color and work your final rounds.

And there you go...a beanie with graduated colors!


Swirly Rose - Free Pattern

Swirly Rose
           by Christina Ramirez


Notes: I used a H (5.0 mm) needle and worsted weight yarn. This is worked in a continuous round.

Swirly Rose
2.5"(*3.25")across
To start, form a magic ring.
   Round 1: Ch 2. Dc 10 times into magic ring. Tighten loop.
   Round 2:  Skip starting chain. Bpdc into first dc of round 1 twice. Continue 2 bpdc in each dc around (20bpdc)
   *SKIP for the smaller flower  Round 3: Just like the previous row, do 2 bpdc in each of the previous rounds stitches.  (40 bpdc)
   Round 4: Bpdc in next 10 stitches.  Bpsc in next st. Sl st. in next stitch. Tie off.

Finishing
With the same or an alternating color, find the first st on the center of the flower.  Attach yarn and ch 1 and then sc in same st.  Continue to sc in each st. all the way around the flower.  Tie off.  The tail from where you attached the new yarn can be pulled through to the back.

Leaf
Ch 10
  Row 1: Sc in second st from hook. Hdc in next. Dc in next. Trc in next 3 sts.  Dc in next. Hdc in next and sc in last.
  Row 2: Starting on the other side of the ch in first st, repeat row 1.
Turn and work sl sts through the middle of the leaf until the end.  Leave a long tail for sewing.


Please feel free to sell any items you make from my patterns but please do not reproduce my pattern as your own.  You do not have to credit me when listing items for sale but if you love it please feel free to tell everyone where they can get one!


Free Scarf Pattern!


This is a scarf I made for the 2012 Scarves for Special Olympics through Red Heart.  There are specific guidelines for color, length and width so if you are making this scarf for that purpose be sure that you check out their site: http://scarvesforspecialolympics.org/.


NOTES:  I did half double stitches but I picked up all three loops on the top so that it didn't leave lines.


Chain 21
Row 1: With red, sc in second chain from hook and continue until the end of the row.  (20 sc)
Row 2-21: Ch 2 and turn and hdc across (20 hdc)
Row 22: Change to blue.  Ch2 and turn and hdc across. (20 hdc)
Row 23: Change to red.  Ch2 and turn and hdc across. (20 hdc)
Row 24-27: Ch2 and turn and hdc across. (20 hdc)
Row 28: Change to blue.  Ch2 and turn and hdc across. (20 hdc)
Row 29: Change to red.  Ch2 and turn and hdc across. (20 hdc)
Row 30-32: Ch2 and turn and hdc across. (20 hdc)
Row 33: Change to blue.  Ch2 and turn and hdc across. (20 hdc)
Row 34: Change to red.  Ch2 and turn and hdc across. (20 hdc)
Row 35-36: Ch2 and turn and hdc across. (20 hdc)
Row 37: Change to blue.  Ch2 and turn and hdc across. (20 hdc)
Row 38: Change to red.  Ch2 and turn and hdc across. (20 hdc)
Row 39: Ch2 and turn and hdc across. (20 hdc)
Row 40: Change to blue.  Ch2 and turn and hdc across. (20 hdc)
Row 41: Change to red.  Ch2 and turn and hdc across. (20 hdc)
Row 42-59: Repeat row 40-41
Row 60: Change to blue.  Ch2 and turn and hdc across. (20 hdc)
Row 61: Ch2 and turn and hdc across. (20 hdc)
Row 62: Change to red.  Ch2 and turn and hdc across. (20 hdc)
Row 63: Change to blue.  Ch2 and turn and hdc across. (20 hdc)
Row 64-65: Ch2 and turn and hdc across. (20 hdc)
Row 66: Change to red.  Ch2 and turn and hdc across. (20 hdc)
Row 67: Change to blue.  Ch2 and turn and hdc across. (20 hdc)
Row 68-72: Ch2 and turn and hdc across. (20 hdc)
Row 73: Change to red.  Ch2 and turn and hdc across. (20 hdc)
Row 74: Change to blue.  Ch2 and turn and hdc across. (20 hdc)
Row 75-78: Ch2 and turn and hdc across. (20 hdc)
Row 79: Change to red.  Ch2 and turn and hdc across. (20 hdc)
Row 80: Change to blue.  Ch2 and turn and hdc across. (20 hdc)
Row 81-99: Change to blue.  Ch 2 and turn and hdc across (20 hdc)
Row 100: Ch 1 and sc across (20 sc)


Edited 1/7/2012


Please feel free to sell any items you make from my patterns but please do not reproduce my pattern as your own.  You do not have to credit me when listing items for sale but if you love it please feel free to tell everyone where they can get one!